
Creating Cards
Wow, can you believe you're here? You're well on your way to sharing your art and writing with the world!
GCU greeting cards are becoming more popular each day and the rate of growth of sales is significant.
If you devote time and attention to making attractive and competitive cards, this venue can be very rewarding.
THE BASICS
- Image Proportion - Greeting cards printed 5"- wide x 7"- tall and are referred to as Portrait Cards. Similarly, cards printed 7"- wide x 5"- tall and are referred to as landscape cards. The proportion is 1.4, that is, 7 inches divided by 5 is 1.4. When you upload cards they will be shrunk or stretched to achieve this proportion. In other words, it is best to prepare your artwork and images for this proportion so that the mighty GCU computer doesn't have to shrink or stretch your fine work.
- Image Quality - Good printing is considered to be any resolution above 300 dots-per-inch (dpi). GCU recommends 300dpi for uploaded images, so for a portrait card, prepare the file to be 1500 pixels x 2100 pixels. For a landscape card this would be 2100 pixels x 1500 pixels. Images with resolutions lower than 180dpi will be rejected.
- Color Format - Only RGB (Red-Green-Blue) color model images are accepted. CMYK (Cyan-Magenta-Yellow-Key;Black) color model images will not be accepted. [NOTE: Adobe1998 color space is the "base" RGB profile used by the printer, and it gives the most consistent conversion to the CMYK color space used by the printer. sRGB may be a larger color space, but it's not as consistent or predictable.]
- File Format - The file must be a jpeg file and have the extension ".jpg".
- File Size - The maximum file size is 3.58 Megabytes. An error will be generated for files larger than this.
Review the Bleed Area - you should have read this already but if not, read this first.
THE CARD TEMPLATE
A card template is available to aid you in your layout work. This template is a layer that you place over your 5x7 or 7x5 image in your graphics program to identifies the edges of the bleed area. Before finalizing your file, hide or delete this layer so that it does not appear in your final image.
There is one template for portrait cards and one for landscape cards. They are available together in one ZIP file located at Menu C7 - Images & Cards Download Card Template. When you click this link, a file download pop-up window will surface allowing you to chose either OPEN or SAVE the file. If you hit OPEN the file will be downloaded and stored in a temporary directory for you to save in another directory or to open. By selecting SAVE from the pop-up window the ZIP file will be downloaded to a directory you select. Once download, extract the 2 templates to a directory you regularly used to do you graphics work.
The card templates are photoshop files (.psd). This format can also be imported into other graphics programs such as Corel Paint Shop Pro. You can also create your own using the 2 images below (click to see, right click to Save-Target-As).
Landscape template as a png file
Portrait template as a png file
NOTE: Any cards you create will be reviewed prior to approval. Reviewers will ask you to resubmit cards where text or critical parts of your art are too near or in the bleed area. Take care to layout your work carefully.
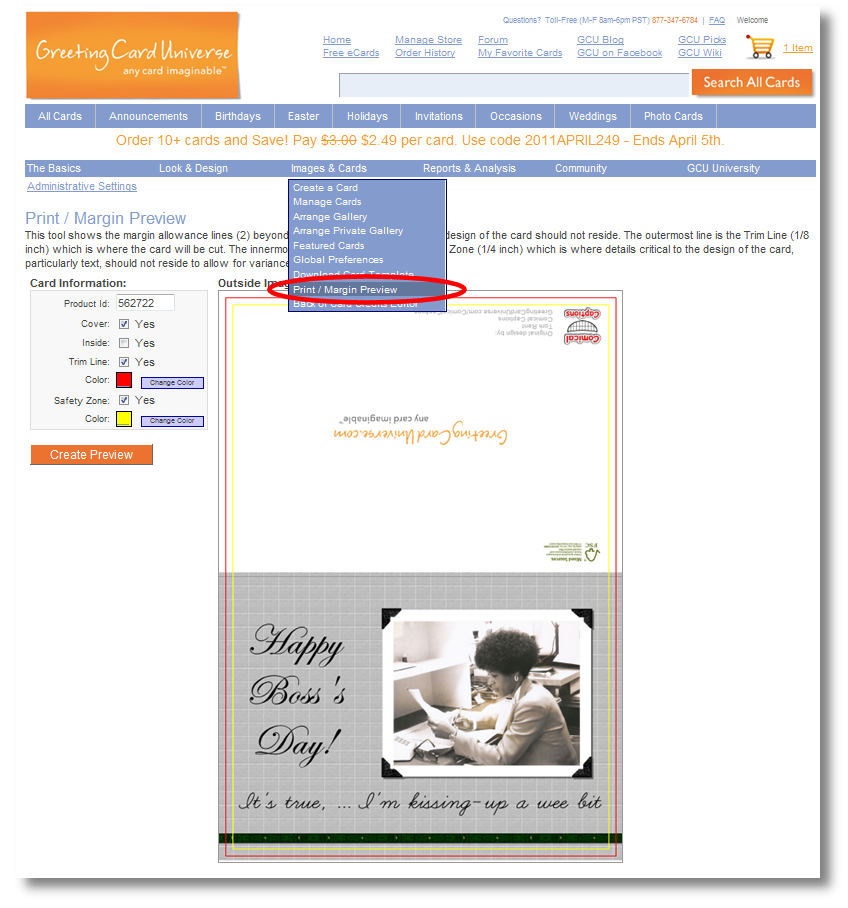
There is also a PRINT/MARGIN Preview tool under Menu C8 that you can use to review the bleed area on any card. This tool can only be used on submitted cards, but it is a good thing to use once you have submitted a card if you are unsure about the bleed area. There is also a link under each card in the LIST view that allows you to review the bleed area directly as well.
Now let's CREATE a CARD!
Manage Cards - edit cards once submitted